Hello friends! Welcome back!
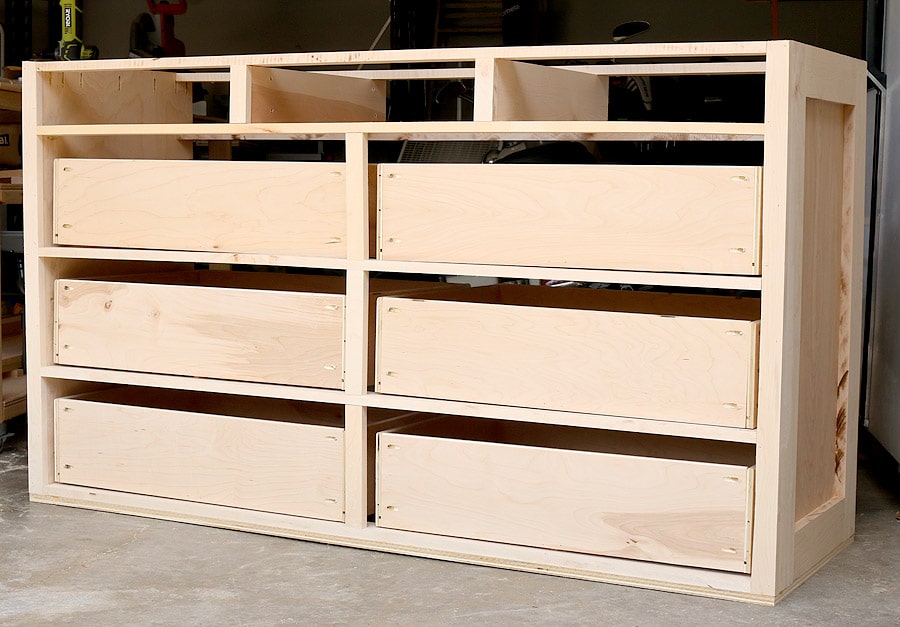
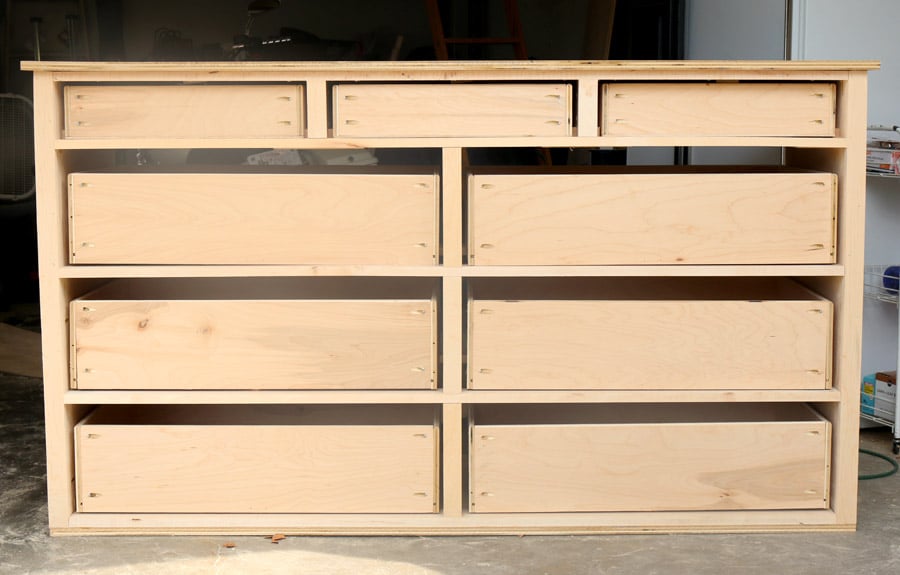
Okay, so here’s where we left off last week: the large drawers are done (happy dance!) so now we’re moving onto building the small drawers. Are you ready? Hold onto your hats, ladies and gents, because this is going to be so stupid simple it’ll have you going, “well, duh!”
 Read the complete tutorial:
- Part One: Building the Carcass
- Part Two: Building the Large Drawers
- Part Three: Building the Small Drawers (you’re here!)
- Part Four: The Final Details

*This post contains affiliate links. To read my full disclosure policy, click here.
I went back and forth on how to build the small drawers. I took a few days and just mulled it over. I quite enjoy mulling, actually. I did it on the couch, I did it in bed, I did it in the car… you can do it just about anywhere. Get your mind out of the gutter – I know what you’re thinking, you.
Since I used these hardwood drawer slides for the large drawers, I wanted to use wood slides for the small ones too, but I didn’t want to lose any more valuable real estate in the drawers. In other words, the small drawers are shallow enough as it is and these center mount slides would’ve made them even shallower. That’s a weird word, isn’t it? Shallower. I’m inclined to say “more shallow” but “shallower” is correct. Thanks Merriam-Webster.
And I couldn’t use metal drawer slides since I ran my mouth off about how important it was to use wood slides with furniture and blah blah blah. So after a bit of searching, I found this video and it was the perfect solution. In fact, I wish I would’ve found it earlier because I would have built the large drawers like that dude did and saved myself a bucket full of tears. Doh!
First, I measured the space where the small drawers would go and built the box to fit. I used 1/2″ plywood for the drawer fronts, backs, and sides and routed the top edges with a 3/8″ roundover bit. I drilled 5/8″ pocket holes and constructed the box with 1″ pan-head pocket hole screws.
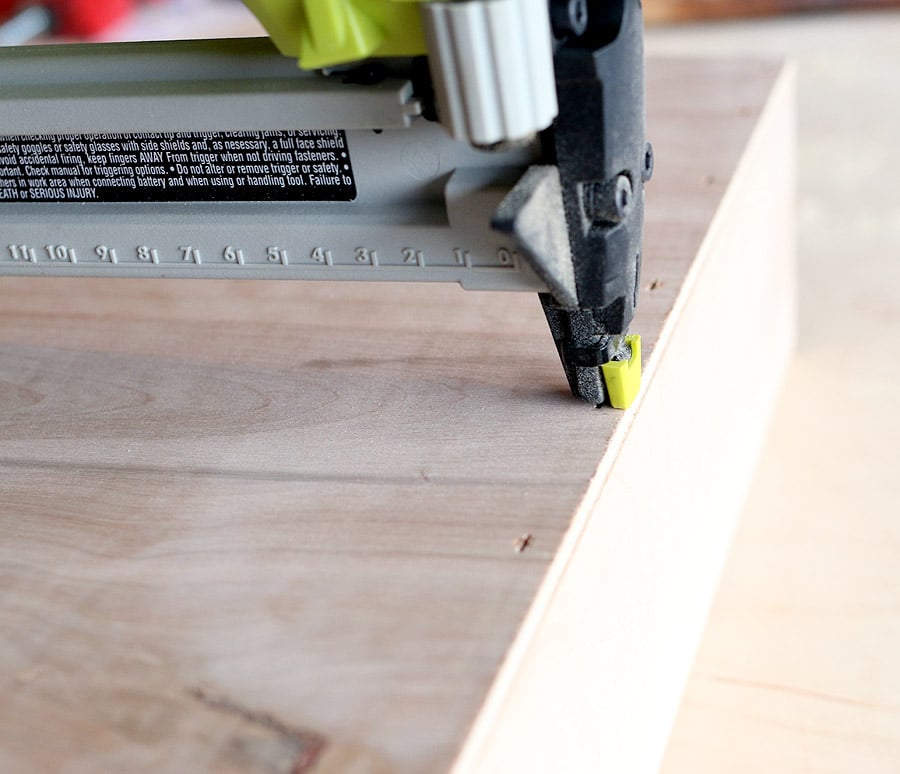
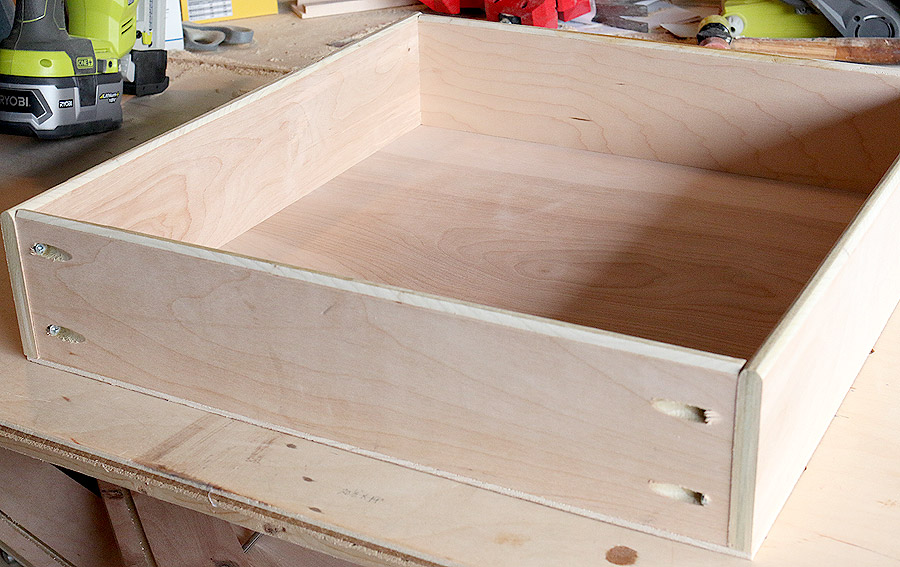 Instead of routing a groove for a floating bottom panel like I did with the large drawers, I used my cordless pneumatic stapler and stapled the bottom onto the drawer box. Staples will be more secure than brad nails in this case.
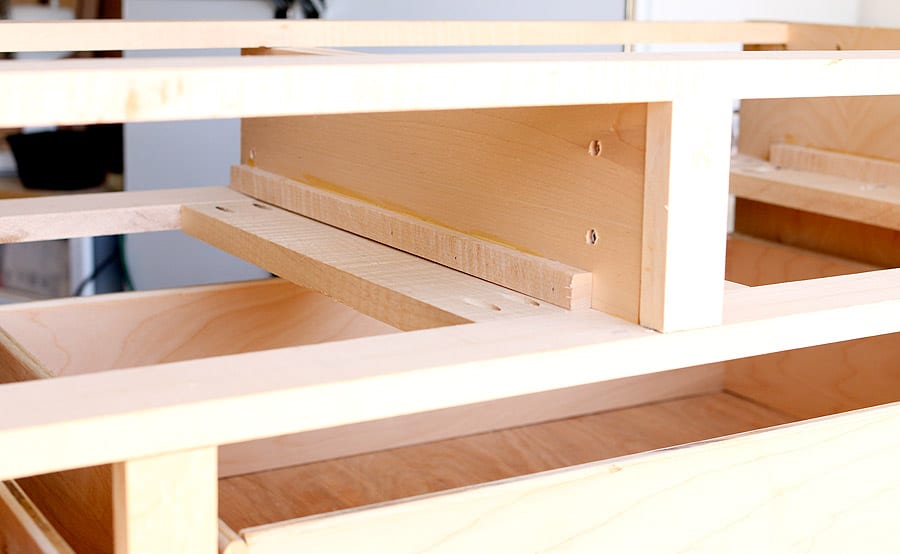
 Next, I added these drawer supports to the carcass, attaching with 3/4″ pocket holes and 1-1/4″ pocket hole screws.
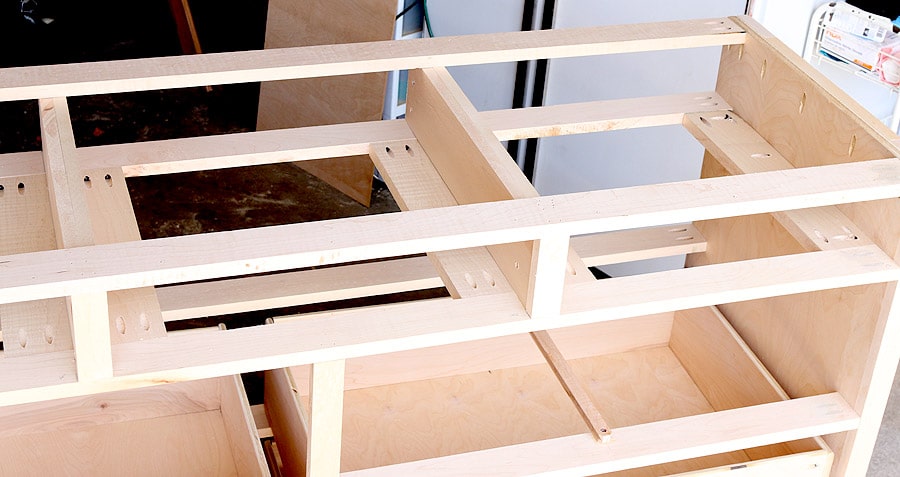 To keep the drawer from binding, I added these little 1/2″ pieces to guide the drawer straight. I used wood glue and brad nails to attach it. Please excuse my messy glue-up job. Nothing to see here, folks. Move along, move along.
 Then I slid the drawer into place and there ya go: DIY wood drawer glides! Super simple, right?
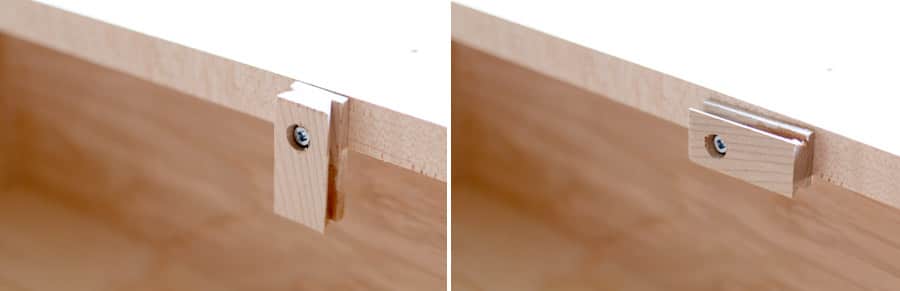
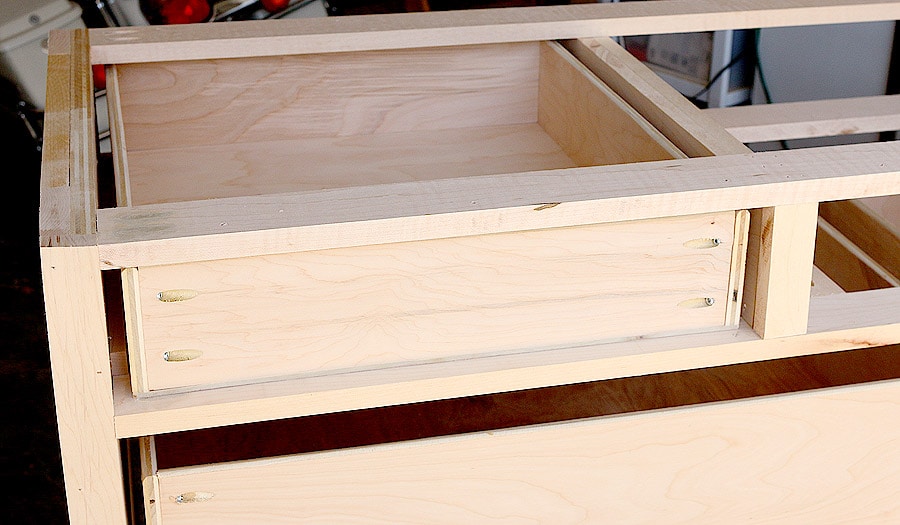 I’ve got a simple solution to keep the drawer from coming all the way out and crushing your toes. I used the scrap ends that I cut off from my hardwood drawer slides since it already had a countersunk pilot hole drilled in. I just screwed it to the inside of the carcass so that it would stop the drawer from sliding all the way out. I didn’t over-tighten the screw so the drawer stop could swing back and forth, in the event you wanted to remove the drawer. You can see this baby in action in this video (jump to the 13-minute mark).
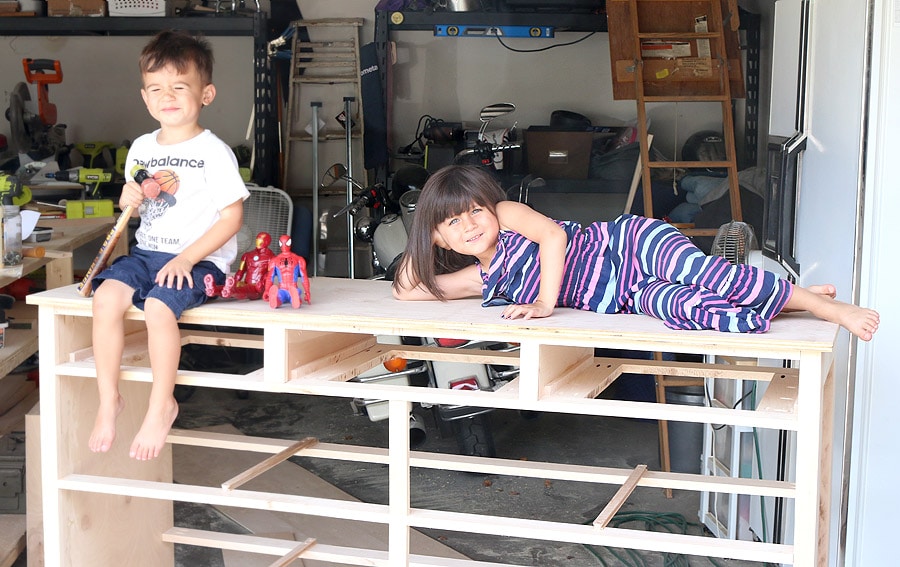
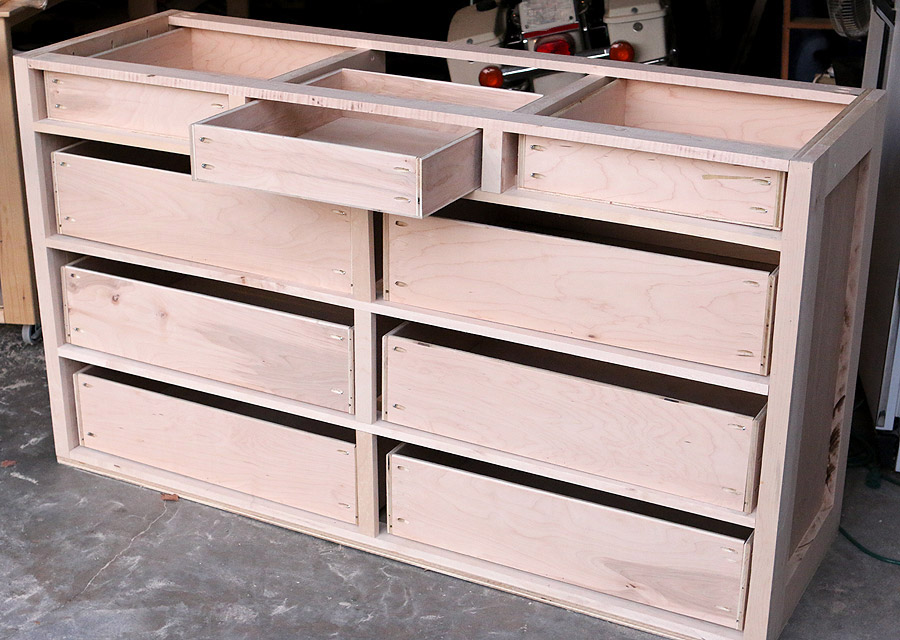 Now that all the drawers are built, it’s time to attach the top. You can use clamps or weights to hold the top down while you drive in the screws. In my case, I used tiny children helpers who were more than happy to sit on the top while I attached it. Child labor comes cheap; they’ll work for M&Ms. And yes, they’re running around barefoot in my sawdust-covered workshop. Don’t judge. #motheroftheyear
 Originally, I wanted to attach the top by driving the screws in from underneath, so there would be no visible screw heads in the top, but my drill wouldn’t fit in since I added those small drawer supports. I was able to screw from underneath on the front and back, but the sides had to be attached with screw heads on top. So much for drilling those pocket holes beforehand. Oh, well. I did countersink the pilot holes so I could fill it with wood putty later on, to hide the screw heads. Some may call it an oversight, I call it a design element. To-may-toe, to-mah-toe.
 Next on the building agenda is to attach the back panel, decorative cove moulding, drawer faces, and bun feet so stay tuned for Part Four. In other words, it’s smooth sailing from here on out. Thanks for reading, have a lovely week, friends!
Read the complete tutorial:
- Part One: Building the Carcass
- Part Two: Building the Large Drawers
- Part Three: Building the Small Drawers (you’re here!)
- Part Four: The Final Details
And here’s a sneak peek of what’s to come (spoiler: it ain’t pretty):


Hi Jen, looking forward to making this dresser and was wondering if part four and the plans will be posted soon. Great site, and thanks in advance.
Any update on finalizing these plans… Would love to build this dresser. Thanks!
You could attach the top sides with pocket hole screws from the outside if you wait to put the top piece of 1×4 trim on the sides and hid the pocket holes under the trim. Just a suggestion, and what I plan to do when I build mine.
Thanks for a great tutorial and a great set of plans!